Solid Brick vs. Brick Veneer

Solid brick and brick veneer structures use some of the
same construction materials, but their installation techniques are
different.
Solid brick houses (also known as double-brick and solid masonry
houses) are built from either two layers of brick, or a layer of
concrete block and an adjacent layer of brick on the exterior. The brick
is part of the building’s structural support system; if the brick were
removed, the building would suffer structural failures.
Brick veneer is not, contrary to popular belief, composed of thin
pieces of brick, such as is found in veneer floors, patios, and
decorative interior elements. Brick veneer houses look almost identical
to solid brick structures, except that they are built using a very
different technique. The house itself is constructed from steel or
wooden framing, and then covered with wood sheathing or insulation. A
single layer of brick is built near each exterior wall and attached to
the house with metal ties. Veneer brick does not support the structural
load of the building; if the brick were removed, the house would
continue to stand.
Installation
Solid brick and brick veneer both use the same bricks, although each
style becomes defined during installation. Inspectors can use the
presence of the following elements as evidence that a wall is solid
brick rather than veneer:

- header bricks. These bricks appear smaller than the other bricks, but they are actually the same size; laid sideways, only the short end is visible. The header bricks act as a bridge between the outer wythe (layer) and the inner wythe, and prevent the two from separating, which is especially important as the wall increases in height. Header bricks are found in every sixth row in many solid masonry configurations, although other configurations are possible. On occasion, metal ties are used to hold wythes together and, in this case, no header bricks may have been required, allowing the wall to appear like a veneer.
- reinforced arches. Surrounding windows in solid brick houses, there will be reinforced arches with blocks that face in toward the house to reinforce the opening.
- older brick houses (older than 30 years) are much more likely to be solid brick than brick veneer.
Brick veneer, unlike solid brick, can be installed any time after
building construction has been completed. The home's exterior sheathing
is covered with special paper to protect it against moisture and wire
ties are attached at intervals, per building codes. The bricks are all
laid horizontally (no header bricks) and are located several inches to a
foot from the home. Weep holes are used to allow the space between the
brick and frame walls to breathe and to permit accumulated moisture in
this area to escape. Unfortunately, weep holes are often clogged by
mortar as a result of the construction process. Clogged weep holes will
allow moisture to accumulate behind the bricks, leading to decay that
attracts pest infestation. Special vents can be installed in the veneer
surface to relieve this problem, although many people consider them
unsightly.
Benefits of Solid Brick
- Solid brick is much more stable in the event of an earthquake or heavy winds. Solid brick houses are resilient and may last centuries.
- Because there is no interior wood framing system, termites and decay are not an issue.
Benefits of Brick Veneer
Builders specifically choose brick veneer for the following functional and stylistic qualities:
- It is relatively easy to install, since there is only one layer of masonry.
- It is generally more affordable.
- It requires a relatively simple foundation and support system. Solid brick homes, by contrast, are very heavy, and require substantial footing and foundation systems.
- The air cavity between the brick and the home helps to keep moisture
out of the home and acts as an effective insulating space, especially
if it is filled with insulation. Solid brick walls are poor insulators,
and also may allow moisture to penetrate exterior walls and cause
problems in the home. Note that the house wrap beneath veneer may leak
during heavy rain, perhaps due to the holes that are placed in the wrap
during installation.
- Like solid brick, veneer is durable and fireproof, it looks fancy, and it requires little maintenance and no paint or stain.
In summary, solid brick and brick veneer homes use many identical
building materials, although they differ by their methods of
installation.
Installing Brick Veneer Inside Your Home
Thin Brick, Brick Veneer, Faux Brick, Half Brick, whatever they call it in your neck of the woods, lets get this show on the road!!First, I feel like I need to open with a disclaimer. I found a lot of conflicting info online about how to actually install brick veneer over dry wall. Some online sources recommend installing concrete backer board, or metal lath to your drywall before you put the brick on. Others said that it was totally fine to install it directly to the drywall if you are using the right kind of thinset. So I decided to ask the experts actually in my life (that do this day in and day out) what they thought. They said that installing directly to the drywall is the way that they do it, and have done it for the last 25+ years. So that is what I did. If you at all have differing opinions or are concerned about replicating this project in your own home, please for the love of all that is holy take the extra precautions that will make it so that you can sleep well at night.
Now that I have officially sucked the fun out of the room we can begin!
The very obvious first step in turning the living room into a loft was brick. Brick it all.
(Just a reminder, this is what we started with)
Installing brick veneer is a really simple project, I feel like the hardest part was not eating a massively frosted sugar cookie at the end of every day. (You’ll see why in a second!)
I bought the brick from a local shop (the same amazing guys that we used at the restaurant). You can expect to pay $5.00+ per sq/ft. If you are in Southern Utah and recreating this project Quickstone is 100% who you want to work with.
Because we decided to install the brick directly over drywall, the first thing that we did was clean the wall really well. Make sure that all of the dust is off the wall and wipe everything down with a slightly damp rag. If you are dealing with grease and/or grime you’ll want to use something more heavy duty like TSP to get all of the oils off.
The next step is to get level lines on your wall. You can use a chalk line, a laser level, or (if you are lucky like me!) you might already have lines on it! The look that we were going for was a little imperfect, having such a large space between the level lines worked out so well (That way I’d have something to recheck everything on every 4 rows or so, but it isn’t row by row perfection.)
Like I mentioned earlier, using the right product for the job is CRITICAL. We used OmniGrip from The Home Depot. Its is a spreadable mastic and it worked so so well.
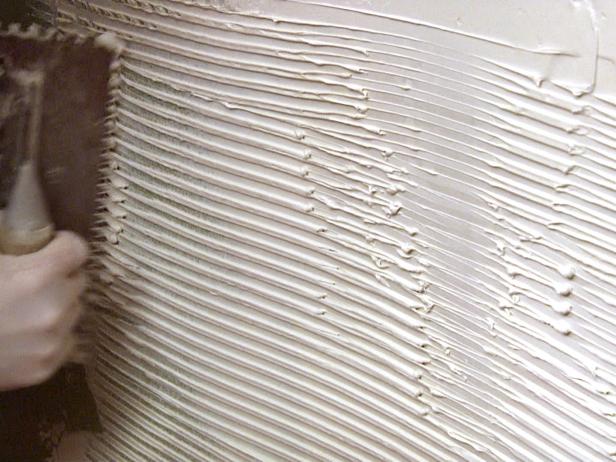
When you are ready with your lines, the first step is to spread a thin layer of OmniGrip all over your wall and let it dry. This will give the adhesive that you are putting on the brick something to grab to so your bricks aren’t sliding all over the place.
When you are spreading adhesive to the back of your brick, you want a good thick layer. Like a perfectly frosted sugar cookie.
Then, once you have the entire brick covered, use your trowel to scrape out a line in the center. This creates a suction cup of sorts when you are sticking the brick to the wall.
Press it down firmly. You’ll get the hang of the entire process really quick.
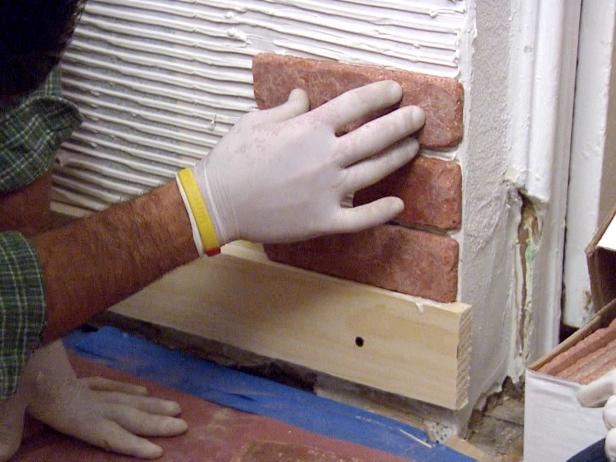
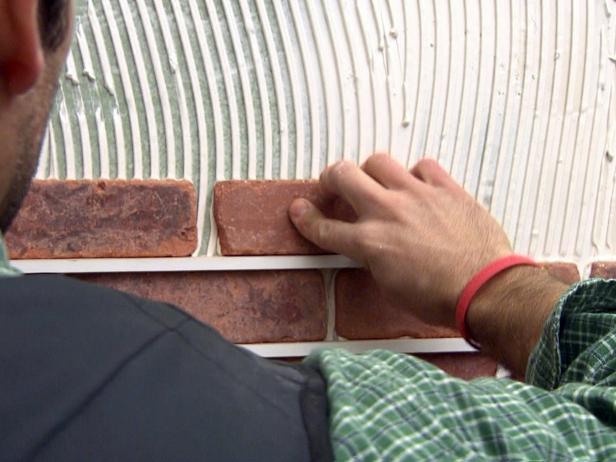
The best way to work is to start at the bottom and work in a medium sized section. I didn’t want the brick to be perfectly spaced, so I just used my finger to check the spacing. In the picture below you can see a piece of wood that is the new baseboard. We used this to figure out the spacing from the floor. The brick settled down a little, so in hind sight it would have been better to install this first, but it wasn’t a big deal to cut 1/8” off of it.
It took about a day and 1/2 to get to this point (with 2 people buttering the bricks and 1 placing them).
When we started working on the second wall I decided that I wanted the brick Soldier style above the windows (Soldier style is when the brick stands in a uniform vertical line)
Which meant that we needed to change the brick above the doorway that had already been installed.
You guys. Lets go back to the installation debate. The internets say installing veneer to drywall is a bad idea because you are essentially only adhering the heavy wall to paper.
That sounds absolutely HORRIFYING.
But. There is not a doubt in my mind that installing it directly over drywall is a great option. Check out the brick that we pulled to change the style above the doorway.
That is the paper from the OTHER SIDE of the sheetrock.
Crazy right?
To finish off the rows along the windows and doorway we tried a few different techniques.
The first (pictured on the left) was using a brick hammer. Which is basically a hammer with a chisel on one side. On a scale of 1-10 I would rate this technique around a 5. If you are going for rough imperfect edges it is great, but if the edges along the doorway are the only places that the brick is broken it looks a little weird. And it is hard to break the piece in an exact size.
The next technique (on the right) that we used was a wet tile saw and it worked SO well. It was easy to control the cuts and worked especially well for the long cuts along the ceiling.


